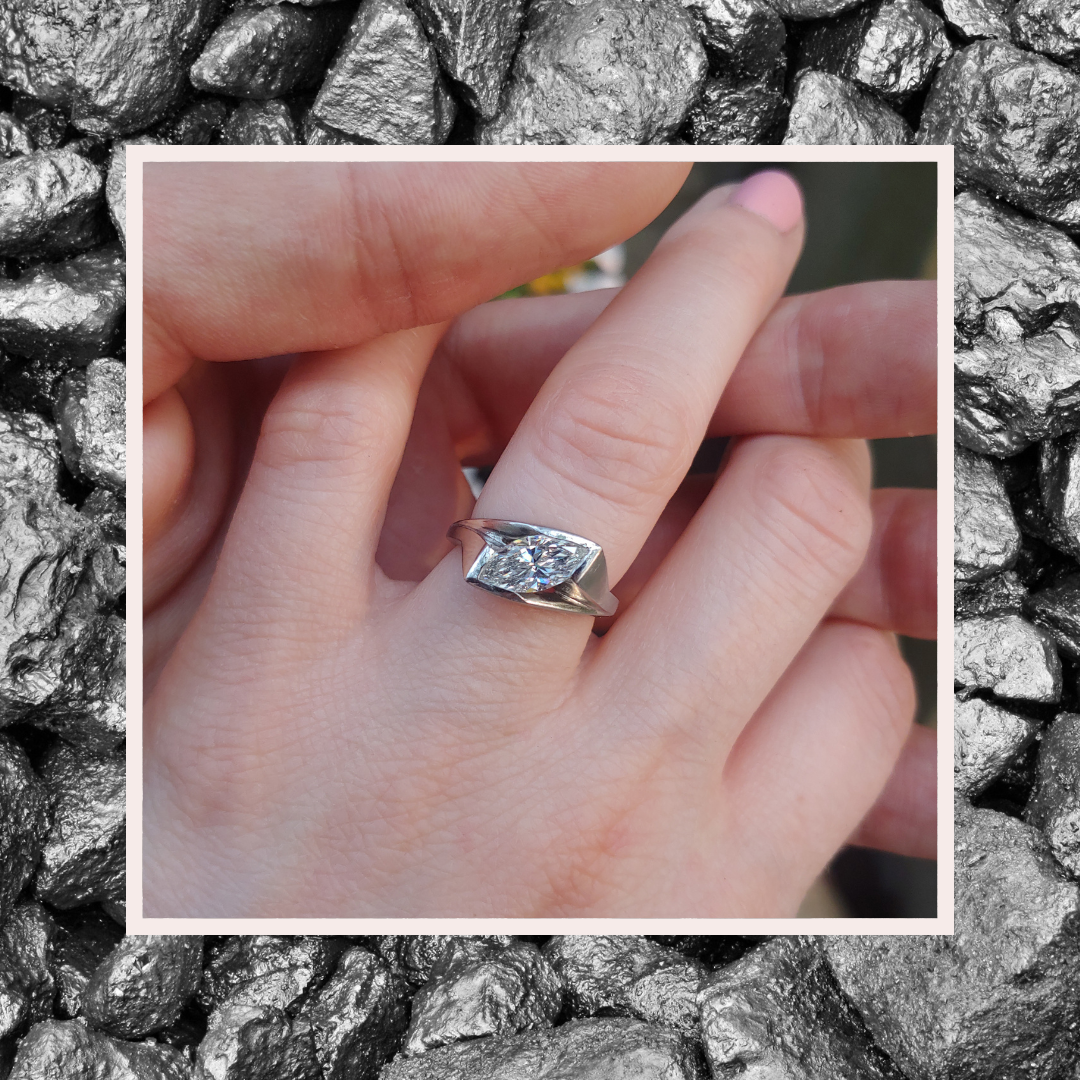
A January Surprise
On January 28th, 2023 Hunter had a surprise for me. Unbeknownst to me, Hunter was planning this moment for months. Our home has an original laundry chute and is one of our favorite features of our 1925 bungalow. Hunter and I were chatting in our basement and he told me he had something cool to show me with our laundry chute. Hunter used a little robot in the chute to release the ring box on command. He caught the box and knelt down to ask me, “Rachael Morgan Hicks, Will you marry me?” Full name and all. I was anticipating the proposal of course; I made the ring! But I was totally surprised at the timing. I said yes!

I made and gave Hunter this white gold band to propose with right before we moved into our new home. You know, just in case the moment struck him.
I wanted my engagement ring to feel like me; a mix of classic and modern.
Finding a Diamond
Honestly, it was a struggle picking a diamond. I wanted a lab grown diamond. They are more earth conscious when compared to earth mined diamonds and that was a real selling point. And truthfully, they are budget friendly option too.
I knew I wanted to set my diamond in a non-traditional setting and an elongated shaped stone fit my overall vision. I decided on a marquise shaped diamond.
History of the Marquise Cut Diamond
The Marquise shaped diamond dates back to the 18th Century, King Louis XV of France, commissioned a jeweler to create a unique cut that compared to his mistress, Jean Antoinette Poisson, the Marchioness Madame de Pompadour’s lips. The cut can also be referred to as a “navette” cut, which means “little ship”.

Carving the Ring
I ended up carving an opening on each side to let light through. With this groove carved, it was the perfect opportunity for contrasting surface treatments. I brushed the surface of the ring to give it a matte finish and kept the groove and bezel polished. Here I have a step by step of the making of my engagement ring.

Carved from a block of blue ring wax. I first carved the seat for my diamond.
Once the diamond seat was finalized, I started carving the outside of the ring.

Slowly the ring is taking shape.

The initial groove carved to let light through.
The final wax before I sent it out for casting.

The raw casting. Needs to be cleaned and polished!

The ring is ready for stone setting. The diamond is just lying in the setting. The bezel walls need pushed over to encapsulate the stone and prevent it from moving out of its setting.

The finished ring!
Since late January, we have selected a date, venue and hired a coordinator and photographer (almost, need to send over our contract after finishing this blog post!)
Hunter and I couldn't feel more blessed to share this news with you! I will be sure to update you all with progress as we plan our 2024 summer wedding!


2 comments
Rachael – I love your story and your ring. The diamond shape and setting are beautiful together. Thank you for sharing!😘
Congratulations! I couldn’t be happier for you and Hunter!! I saw a picture of you with Caroline at Emma’s shower this weekend and you are as stunning as your ring! Wishing you a lifetime of love and happiness!! I also loved seeing the process of creating your ring!!!!😍😍
Leave a comment